Chalking a Pool Stick: A beginners Guide
Chalking a pool stick may seem like a simple task, but it plays a crucial role in enhancing cue performance and accuracy on the table. Whether you’re a beginner or an experienced player, understanding the importance of chalking and mastering the technique can significantly improve your game. In this article, we’ll walk you through a step-by-step guide on how to chalk a pool stick effectively, optimizing your shots and dominating the game. Let’s dive in!
1. Understanding the Importance of Chalking
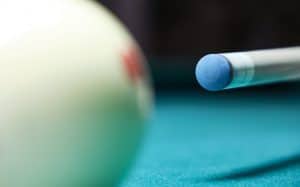
Before we delve into the technique, let’s first understand why chalking is essential. Chalk is applied to the cue tip to create friction between the cue ball and the tip. This added friction helps to reduce slippage and miscues, ensuring you have better control and accuracy over your shots.
2. Selecting the right chalk
Selecting the right chalk is vital for optimal cue performance. There are various chalk options available on the market, but it’s recommended to go for high-quality, reputable brands. Look for chalk that provides good adhesion and stays on the tip for an extended period.
3. Preparing the tip
Before applying chalk, make sure your cue tip is properly shaped and scuffed. Use a cue tip shaper and scuffer to create a slightly rough surface, ensuring better chalk adhesion. This step will also prevent mushrooming and maintain the tip’s shape.
4. Chalking Technique
Now, let’s get into the actual chalking technique. Follow these steps for best results:Now, let’s get into the actual chalking technique. Follow these steps for best results:
- Proper positioning: Position the pool stick in your other hand with the cue tip facing upward and slightly downward.
- Gently rotate the cue tip within the chalk’s concave surface. This technique ensures even distribution of chalk and prevents over-chalking.
- The “twist” method: Instead of simply pressing the tip into the chalk, use a smooth “twisting” motion.
- Repeat if necessary: Chalk can wear off after a few shots, so be prepared to reapply chalk when needed. However, avoid chalking too frequently, as it can cause chalk build-up on the tip.
5. Maintaining Chalk and Cue Stick
To optimize your game, make sure to keep your chalk and cue stick in good condition:
• Keep chalk dry: Store your chalk in a cool, dry place to prevent it from becoming too soft or crumbling.
• Clean the cue stick: Regularly clean your cue stick with a soft cloth to remove any debris or chalk residue.
What to look for in a stick – https://billiardsguru.com/pool-cues/
Excellent selection of sticks – https://www.ozonebilliards.com/pool-cues/
Conclusion
Chalking a pool stick is a fundamental aspect of the game that should not be underestimated. By following the step-by-step guide and understanding the importance of chalking, you can significantly improve your cue performance, accuracy, and overall enjoyment of the game.
Remember to select high-quality chalk, properly prepare your cue tip, and apply chalk using the “twist” method. With consistent practice and maintenance, you’ll be sinking shots like a pro in no time! Happy chalking and happy playing!